This document describes how to connect Claude and Codex to the Komuta MCP server.
What can you do with the MCP?
Before installing, you can browse what the MCP server offers: provision services from a git repository, assess service health with Service Doctor, create managed Postgres / RabbitMQ / Valkey addons, inspect logs and traces, and look up packages and pricing.
Full list of tools and what they do: Komuta MCP Tools
Install for Claude
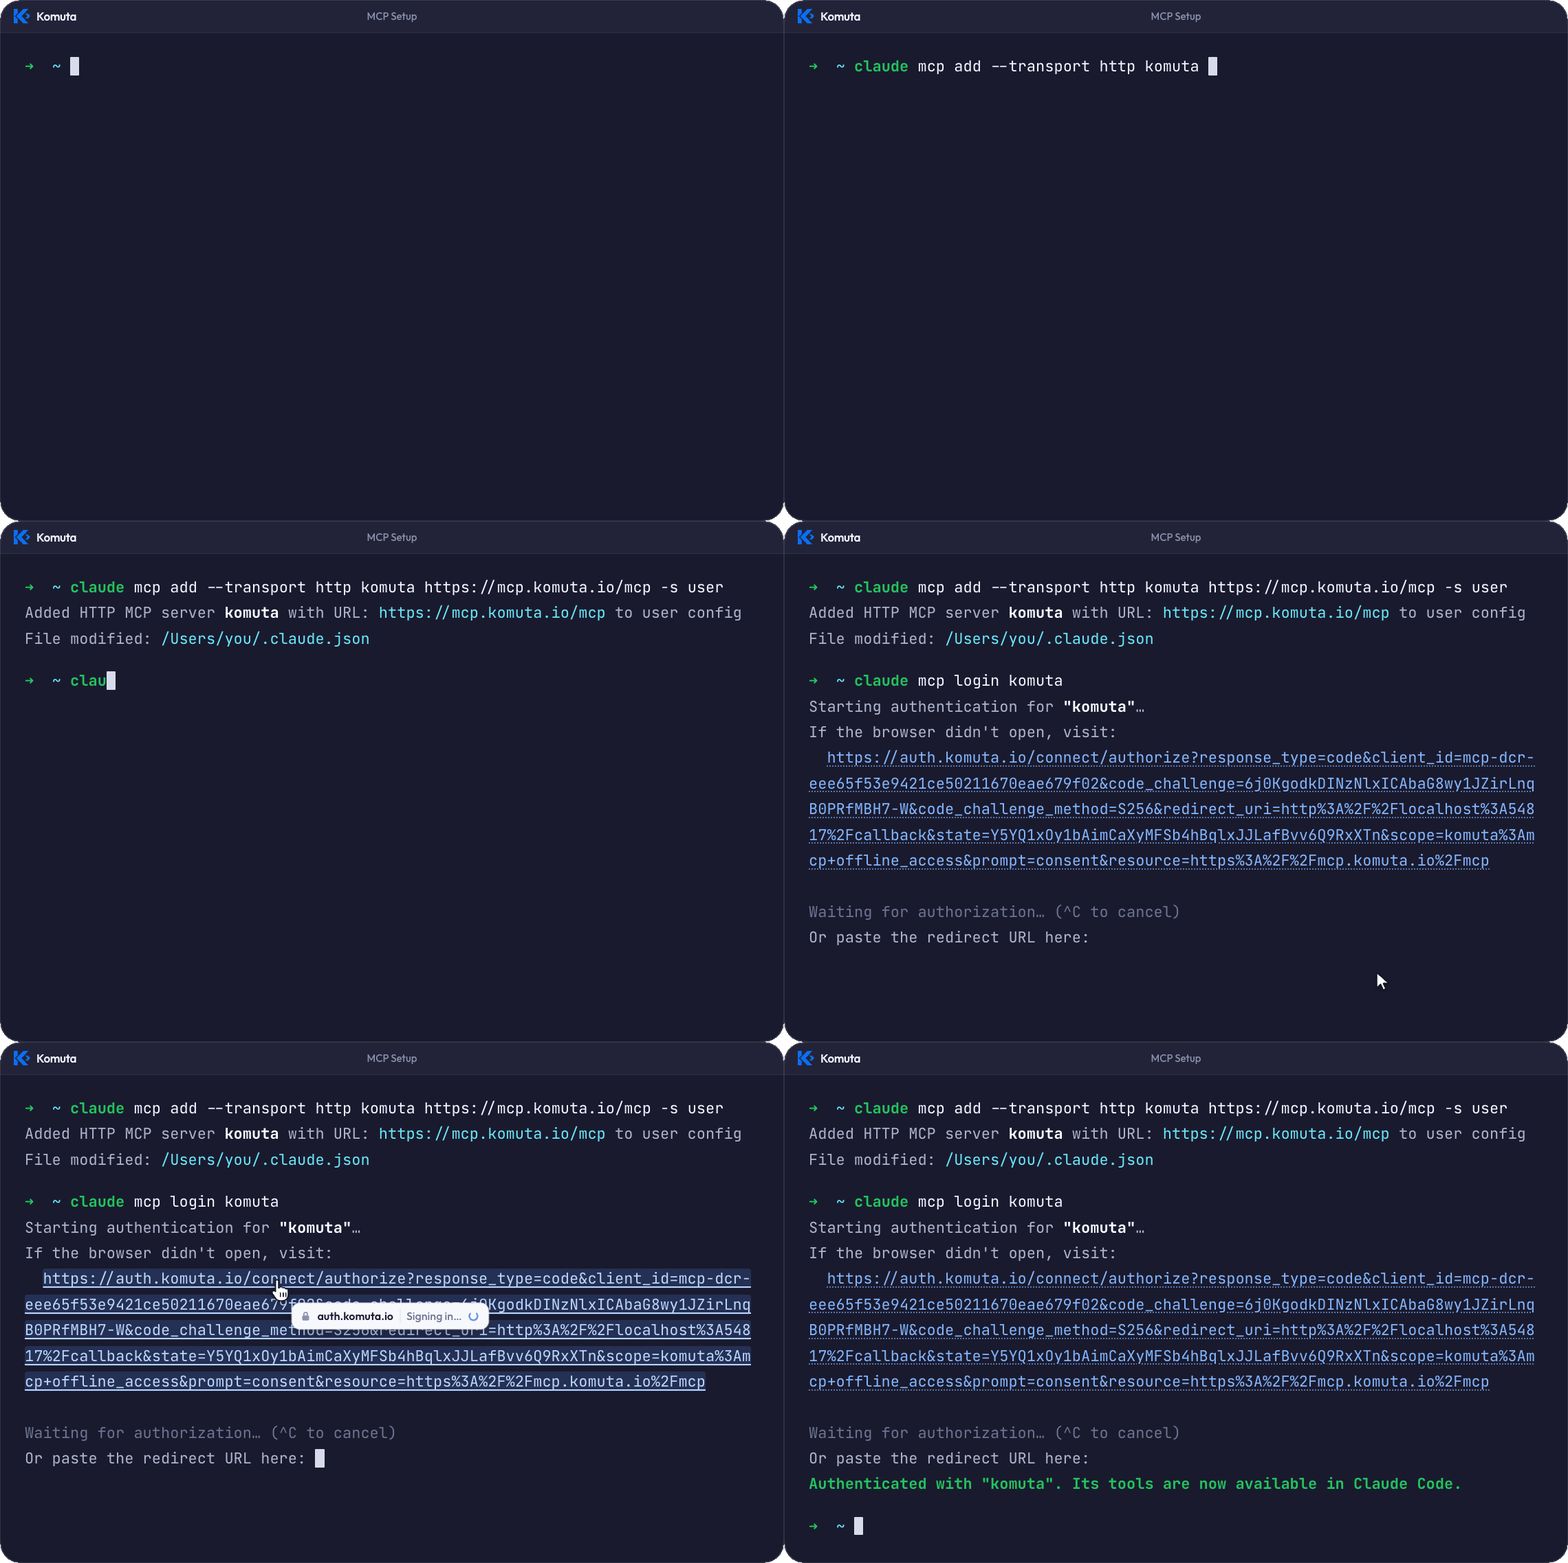
Claude Code (CLI)
claude mcp add --transport http komuta https://mcp.komuta.io/mcp -s user
Log in:
claude mcp login komuta
Claude Desktop
- Go to
Settings→Connectors→Add→Custom Connector. - Fill in:
- Name: Komuta
- Remote MCP Server URL:
https://mcp.komuta.io/mcp
- Click
Add. - Click
Connect.
Install for Codex
-
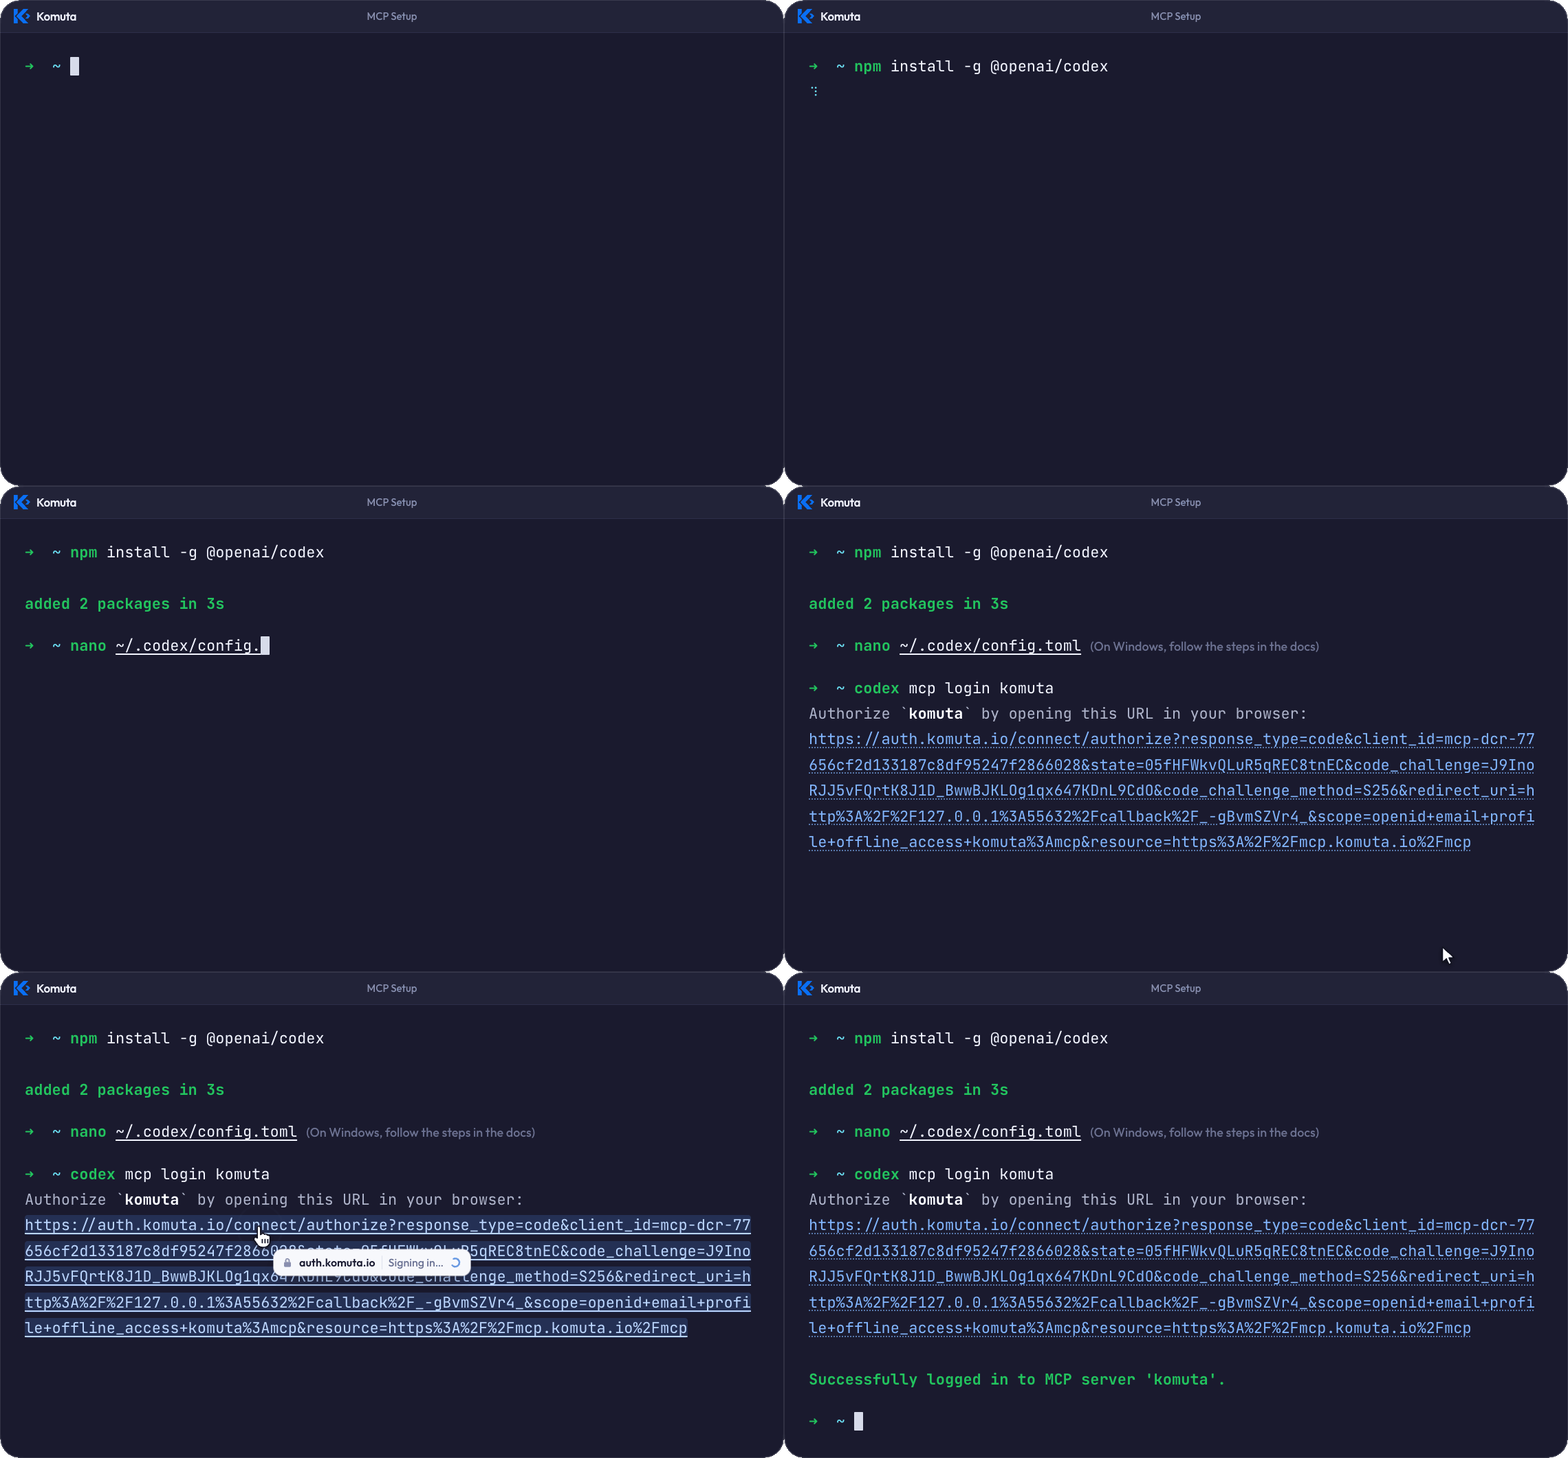
Install the Codex CLI:
npm install -g @openai/codex -
Add this to
~/.codex/config.toml(on Windows:C:\Users\<Username>\.codex\config.toml):[mcp_servers.komuta] url = "https://mcp.komuta.io/mcp" scopes = ["openid", "email", "profile", "offline_access", "komuta:mcp"] -
Log in:
codex mcp login komuta
Verify the connection
Ask the agent to confirm the Komuta MCP server is connected, or to list its available tools. komuta should appear. Or type /mcp to check yourself (if it doesn't appear, try closing and reopening the app).
Troubleshooting
| Symptom | Cause |
|---|---|
| Browser login doesn't open or complete | Re-run codex mcp login komuta; for Claude Desktop, remove and re-add the connector. |
| Server not recognized | Confirm the configuration was added to the right file (~/.codex/config.toml) or via the correct CLI command. |
401 Unauthorized / auth error | The session may have expired; repeat the login step. |